Overview
We will go through the steps to setup a Raspberry Pi Zero 2 and connect to it from our laptops.
Details
Start with a Wi-Fi router that connects to the internet. The Raspberry Pi Zero 2 and the student's laptops (the "Devices") will connect to the router. Each device will get its own IP address from the router's DHCP server. The student devices can use Putty to SSH directly into the raspberry pi (RPI) and use Bash to configure it.
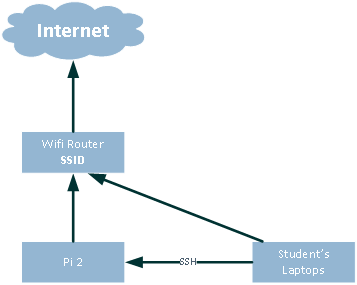
In the club's sandbox environment, a wifi router connects to the Internet so that OS updates and software can be installed on the RPI. The member's laptops will connect to the router to be "on" the same network as the RPI, then use Putty (SSH) to connect to the RPI.
Project
Ingredients
Start with these ingredients:
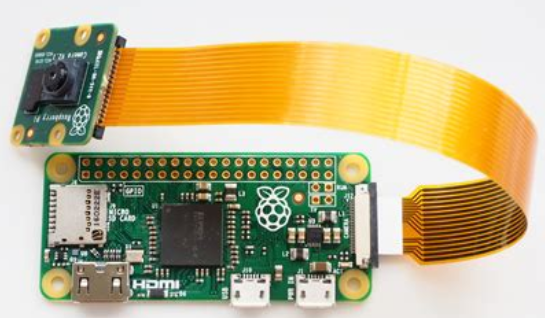
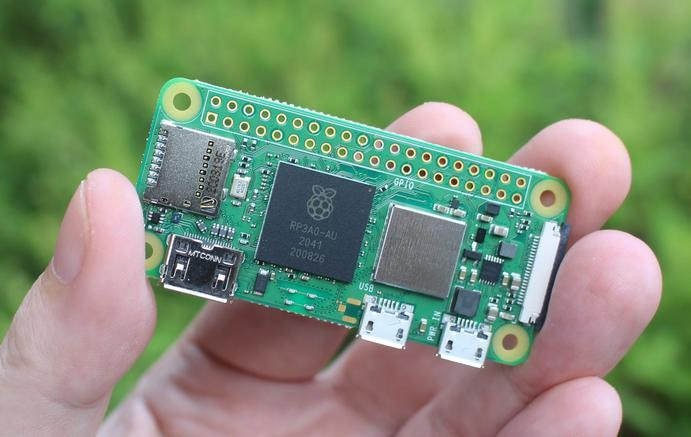
- Vilros Raspberry Pi Zero 2 W Basic Starter Kit with Muti Purpose ABS Case -Incudes Pi Zero 2 W Board, Multi Use Case, Power Supply, HDMI-USB Adapters and More (Black) - contains camera module adapter ($45)
- SanDisk 32GB (Pack of 2) Ultra microSDHC UHS-I Memory Card (2x32GB) with Adapter - SDSQUA4-032G-GN6MT ($9)
- InnoMaker Raspberry Pi Camera Module 5MP 1080P OV5647 Sensor with M12 FOV90 IR Filter LEN for Raspberry Pi 4, Pi 3 B+, Pi 3, Pi 2, Pi B+, Pi A, Pi Zero ($11)
- 5-in-1 Memory Card Reader, USB OTG Adapter & SD Card Reader for i-Phone/i-Pad, USB C and USB A Devices with Micro SD & SD Card Slots, Supports SD/Micro SD/SDHC/SDXC/MMC ($15)
Prerequisites
- Need the wifi's SSID and password
- RPI needs Internet access
Steps
Perform these steps:
- Download OS image Raspberry Pi OS Lite, which is a headless version.
- Use the card reader to burn the image onto the Pi with rpi-imager, which allows you to configure the WiFi, SSH server, password (pi : pi), and network name (e.g. "pi") before burning it so that when you turn on the Pi, it connects to the network and you can hit it with Putty immediately. Thus, you don't need to hook up a USB keyboard and HDMI monitor to start working with it. Python 3.9 comes installed on the distro.
- Put the MicroSD card in RPI
- Attach camera
- insert into box
- Turn on
- SSH to the network name
- Accept SSH key
- Log in
- Run this:
sudo apt-get update
sudo apt install python3-opencv
python3 -c 'import cv2; print(cv2.__version__)'
  # --> 4.5.1
To copy a file from B to A while logged into B:
scp /path/to/file username@a:/path/to/destination
To copy a file from B to A while logged into A:
scp username@b:/path/to/file /path/to/destination
Camera
sudo raspi-config
raspistill -o raspistill.jpg
Additional things to try:
vcgencmd get_camera
--> supported=1 detected=1, libcamera interfaces=0

sudo modprobe bcm2835-v4l2
v4l2-ctl --all
Samba
sudo apt-get install samba
sudo nano /etc/samba/smb.conf
  [MyShare]
  path = /path/to/your/directory
  read only = no
  browsable = yes
sudo systemctl restart smbd
sudo smbpasswd -a yourusername
FILE EXPLORER: \\ip_address\MyShare